At The Bench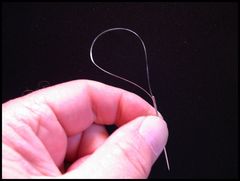 The Whitlock Leg Sewing ToolThe Whitlock Leg Sewing Tool is easy to build and easy to use. It's one of the most useful tools on my tying bench. There are basically two ways to add rubber legs to a deer hair bug. The first way is to bind the legs to the hook shank during the hair spinning and packing process. The problem with this method is that the legs may not end up exactly where you want them. And, there is always the possibility that you may accidently cut off one or more of them during the trimming process. The second way, and I believe the best way, to put legs in a hair bug is to sew them through the hair with a Whitlock Leg Sewing Tool. The tool is easy to make, easy to use, and the legs are placed exactly where you want them. And, you don't have to worry about accidently cutting them off because they are installed after the deer hair has been trimmed. You will need the following materials to build a Whitlock Leg Sewing Tool:
Here's how to make the tool in five easy steps. 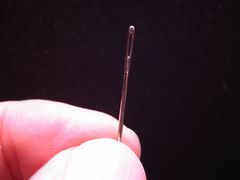 Step 1 Locate a sewing needle with an eye that is just large enough to accomodate 5X tippet material and some glue. 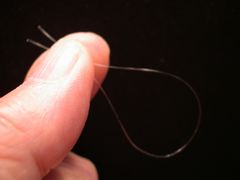 Step 2 Cut a five-inch piece of 5X Tippet material from the spool, fold it, and even the butt ends as shown in the photo. 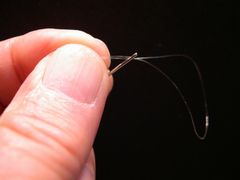 Step 3 Thread about three-eighths of an inch of the butts of the tippet material through the needle's eye and hold the butts against the needle's shaft with your left hand. 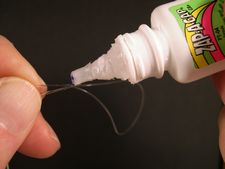 Step 4 Fill the needle's eye with Zap-A-Gap. Make sure you don't glue your fingers to the needle. Try to keep the glue off the tippet butts as much as possible. Continue to hold the tippet butts to the needle's shaft while the glue dries. It will take just a couple of minutes. The glue dries quickly. 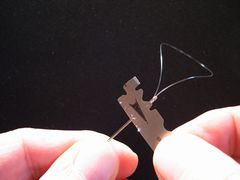 Step 5 Once the glue has dried, use a razor blade to remove the tippet butts and any glue that's on the needle's shaft. Use a double edged razor blade. A single edge blade doesn't work! A double edged blade can be made into two blades by seperating it with a pair of household scissors. Notice that the blade should be moving away from the needle's eye as the tippet butts and excess glue are removed. If not, you will run the risk of cutting the loop of tippet material and you will have to start over. 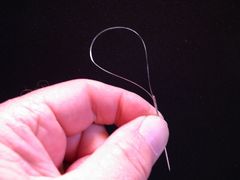 Here is how the Leg Sewing Tool should look after the excess material is removed with the razor blade. The junction where the tippet was glued into the needle's eye should be smooth so that it won't hang up in the deer hair during leg installation. I'm sure that you will discover, as I did, that using a Whitlock Leg Sewing Tool is the answer to worry free rubber leg installation on your deer hair bugs. And, don't make just one. Make a couple because there always is the possibility that the junction between the tippet material and the needle will break during the installation process. 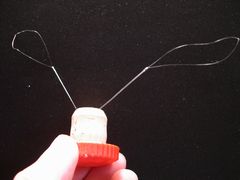 Finally, this little device has a nasty habit of disappearing on my tying bench so I use a bottle cork, "pin-cussion" fashion, to keep it in its place. The bottle cork in the photo works great. It's from a bottle of Drambuie. The Drambuie was also great!
Warmwater Fly Tyer - by Ward Bean
© Copyright 2026 Ward Bean, Council Bluffs, IA, All rights reserved. © Copyright 2026 Ward Bean, Council Bluffs, IA, All rights reserved.
|