Featured Fly Tiers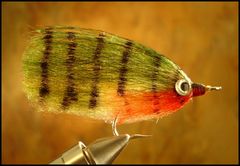
The Stillwater Bluegill Streamer
Tied by Max Birnkammer Georgia angler and fly tyer Max Birnkammer has developed a unique series of streamers usinig synthetic materials for the body and waterproof markers for the color schemes.The Stillwater Bluegill Streamer is one in the series. Materials List
Tying NotesThe Stillwater Bluegill Streamer and it's companion flies; the Stillwater Perch, the Stillwater Trout, and the Stillwater Shad are not hard to tie and are a lot of fun to fish.
The body style is the same for all four streamers. The only difference between each of them is the particular color markings used to identify the species.  I generally tie the Stillwater Bluegill Streamer on a size 12 TMC wide gap bass hook. I also like to use the Mustad saltwater hook 34007 in size 1/0 down to size 10.  The streamer is very durable and it has a life-like look in the water. The weight that I add to the hook is a non-lead .025 wire which helps the fly sink, thereby keeping it in the strike zone. My preferred thread is size 8/0 Uni-Thread but size 6/0 will also work. This thread is strong and works well with the Neer Hair body material.  Neer Hair is very durable and it works well with the Prismacolor waterproof markers. 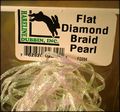 I have found that Pearl Diamond Braid is an excellent highly reflective material that I use to cover the non-lead wire. There are two varieties of Diamond Braid. Be sure to use the flat Diamond Braid, not the round. 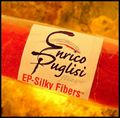 Enrico Puglisi EP - Silky Fibers is another great fly tying body material. It's a finer, more supple, less textured version of Enrico's Sea Fibers. Silky Fiber is excellent for winging small to medium sized streamers. It also makes great gills.  A good quality two-part epoxy is highly recommended for attaching the 3-D molded eyes to the head of the streamer. I also like to coat the head of the streamer with epoxy for added durability. After the epoxy has cured I like to paint the eyes with a clear nail polish. I prefer the Sally Hansen brand of nail polish called "Hard as Nails". Editor's Note: Like many fly tiers I hate to use epoxy. It comes in two bottles and you have to mix the messy stuff together. I have found that Loon Hard Head cement is a great epoxy substitute for coating heads. I also like to use an adhesive called "Goop" to attach molded eyes to any material. It comes in a tube and can be purchased at any hardware store or home center. If you want to learn more oabout Goop and Loon Hard Head go to the "At The Bench" page check out "Glues and Adhesives". 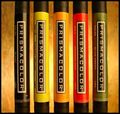 I have found that the Prismacolor brand of markers offers the best selection of colors. Be careful when handling these markers since they are color fast and will dry very quickly on your fingers. Acetone is the only product that I have found to remove any unwanted color stains. Use latex gloves to avoid getting the marker on your skin. Place a couple sheets of a good quality paper towel beneath the streamer as you add your colors. The paper towel will absorb any additional marker colors and it allows you to color your streamer out of the tying vice. Allow 12 to 24 hours for the color markers to fully dry. 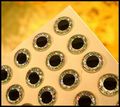 Lastly, a word about the eyes on the Stillwater Bluegill Streamer. There are a number of molded plastic eyes on the market but the best to be found are 3-D Molded Epoxy Eyes. These little eyes with their black pupils give streamers a flashy, impressionistic eye bulge that drive fish berserk! Adhesive backed for easy attachment; add a quick coat of epoxy, Loon Hard Head, or Softex for extra durability. Angling TipsI prefer to use a 6 or 7 weight rod when casting the Stillwater Bluegill Streamer. A rod with a fast tip really helps cast this streamer so that you can put some distance between you and the fish. Most of the bass that I target are usually holding in the two to eight foot depth range so a sinking line is not necessary. I like to use a 2X or 3X leader that's nine feet long and I use a Duncan Loop Knot to attach the streamer to the leader to give the lure a more natural action. After I cast the streamer, I will let it sink slowly to the depth that I want and then begin stripping my fly line with short strips to give the fly a darting motion. One final tip I would like to share with you. I have found it best to soak the fly completely before casting it to help it sink immediately. Spotted, largemouth, and shoal bass can be taken with this colorful streamer. The Stillwater Shad pattern is another favorite because it is very visible and it also attracts many different warmwater species. Tying Instructions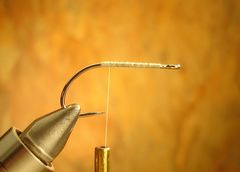 Step 1 Remove the barb from the hook and clamp it in the vice. Wrap 8/0 white Uni-Thread the length of the hook's shank. Let the thread bobbin hang just short of the hook's bend. 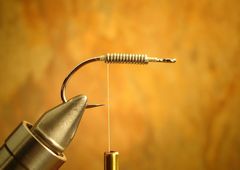 Step 2 Wrap .025 dia. lead free wire forward, stopping approximately 1/4" from the hook's eye. Cut the wire and secure both ends using a small pair of pliers. 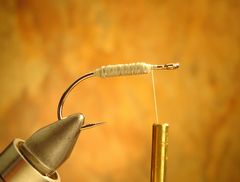 Step 3 Wrap the thread back and forth over the wire until it's completely covered with thread. Coat the thread with head cement. 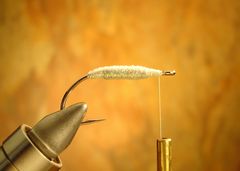 Step 4 Cut a six to eight inch piece of pearl Flat Diamond Braid and tie just forward of the hook's bend. Wrap the braid evenly over the wire and tie off. Trim excess. 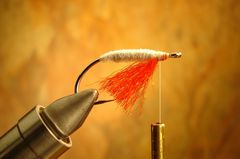 Step 5 Attach a small amount of red EP-Silky Fibers to the bottom of the hook's shank to create gills for the streamer. Trim excess. 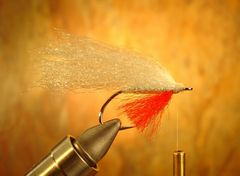 Step 6 Add a medium clump of white Neer Hair to the top of the hook's shank. Secure and remove excess Neer Hair. 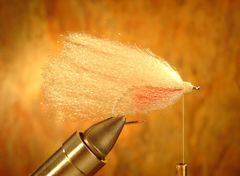 Step 7 Add a smaller clump of white Neer Hair to the bottom of the hook's shank. Secure and remove excess Neer Hair. 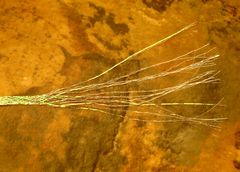 Step 8 Take a four-inch piece of pearl Flat Diamond Braid and separate the individual strands of the material. 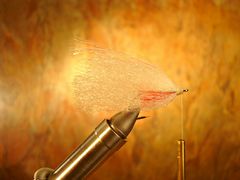 Step 9 Tie the Diamond Braid strands on top of the Neer Hair for a reflective flash effect. 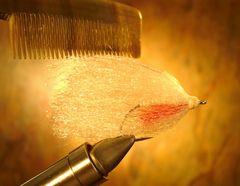 Step 10 After the top and the bottom of the streamer have been covered with Neer Hair, comb back any uneven fibers. 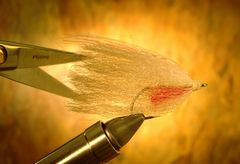 Step 11 Trim the uneven fibers and shape the Neer Hair body. 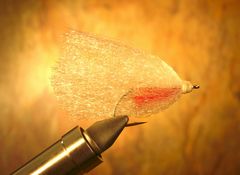 Step 12 After the streamer has been trimmed it should look like this. Now we are ready to begin the steps to add color to our streamer. 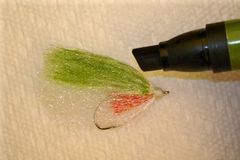 Step 13 Remove the fly from your vise and place it on a piece of white paper towel. Begin by coloring the top half of your fly with Olive Prismacolor. 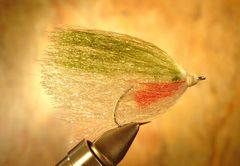 Step 14 After coloring the streamer with the Olive Prismacolor marker it should look like this. 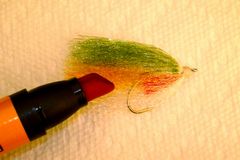 Step 15 Again, place your streamer on a piece of white paper towel and color the middle one-third of the fly with Orange Prismacolor. For the remaining color steps, use the paper towel to absorb the excess Prismacolor. 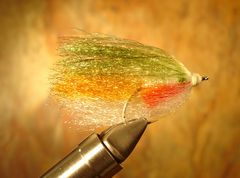 Step 16 Here is how your streamer should look after the Orange Prismacolor has been applied. 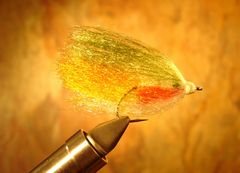 Step 17 Color the area just below the orange with Yellow Prismacolor. Leave the very bottom of the streamer white. 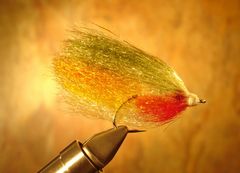 Step 18 Color the area close to the head of the streamer with Red Prismacolor. 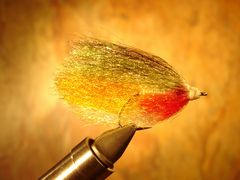 Step 19 Color the very top of the streamer with Black and Dark Green Prismacolor. 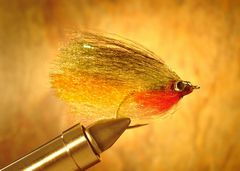 Step 20 Attach the 3-D Molded Eyes to the streamer. Use a good quality two-part epoxy to secure the eyes. Let dry for at least one hour. Coat the 3-D eyes with Sally Hansen's "Hard as Nails" clear polish. 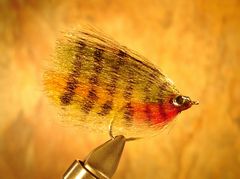 Step 21 Place the streamer on a piece of white paper towel. Using a black medium tip Sharpie pen, gently place the distinct dark vertical bars on the streamer. Flip over the streamer and repeat the process on the reverse side. I prefer to use a medium tip black Sharpie marking pen for the vertical bars because it produces perfect sized barring. The Sharpie also releases more ink than the Prismacolor marker. The problem with the Prismacolor marker is that the fine tip does not release enough ink and the broad tip is too thick to control and produce a clean edge. 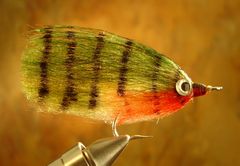 Step 22 Let the colors dry for twelve to twenty-four hours before you take the streamer fishing. Your streamer is now complete.
Warmwater Fly Tyer - by Ward Bean
© Copyright 2025 Ward Bean, Council Bluffs, IA, All rights reserved. © Copyright 2025 Ward Bean, Council Bluffs, IA, All rights reserved.
|


