Swimming Flies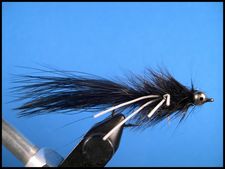 The Plan "B"The The Plan "B" is basically a Woolly Bugger with a few extra parts. Those parts substantially enhance its effectiveness as a warmwater fly. Day in and day out I fish this little swimming fly more than any other streamer. It's a neat big bluegill fly and it also takes its share of bass and other gamefish. Materials List
Tying NotesThe The Plan "B" is a little over two inches long when tied on a size 6 hook. I use different sized bead chain eyes for different sized hooks. On a size 4 hook I use Extra-Large eyes, on a size 6 I use Large eyes, and on a size 8 hook I use Medium eyes. I tie the Plan "B" in Black, Brown or Olive for Bass and Bluegills. Chartreuse or White seems to work best for Crappies. After the marabou tail is attached the fly is built in stages, beginning with a tapered underbody made from Uni-Yarn, then covered with Hare-Tron Dubbin and several palmered hen neck hackles.  Make every effort to use Whiting Hen Neck hackle. It's the best on the market. If your local shop doesn't stock the product or won't order it for you, contact Whiting Farms for a dealer that will. Angling TipsThe large bead chain eyes cause the Plan "B" to swim hook point up, so the fly is fairly snag proof. Consequently, the fly should be fished in structure with confidence. If you occassionally loose a fly it's worth it. You'll catch more fish if you fish the fly in and around structure. Warmwater flies should have as much action as possible, so attach the Plan "B" to your tippet with a Duncan Knot or a Non-Slip Uni-Knot. Use different types of retrieves. The strip-strip-pause retrieve works well. The bead chain eyes give the fly a jigging motion when this retrieve is employed. The figure-eight line hand retrieve also works well. Tying Instructions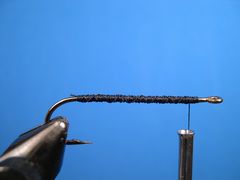 Step 1 Insert the hook in the vice, crimp the barb, and attach the thread at the hook's eye. Lay down a base of thread from the hook's eye to the hook's bend. 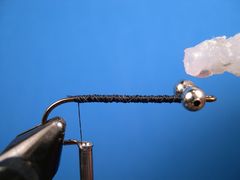 Step 2 Attach the bead chain eyes with several figure-eight wraps and a drop of Zap-A-Gap to glue them in place. 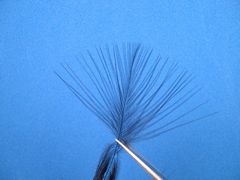 Step 3 Select a Marabou plume for the tail and stroke the fronds back to expose the tip. Remove an inch or so of the tip and stem to make the marabou more lively. 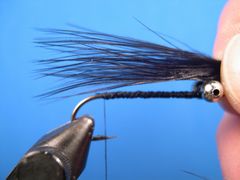 Step 4 Measure the marabou against the hook to determine the length of the tail. The tail should be slightly longer than the hook. 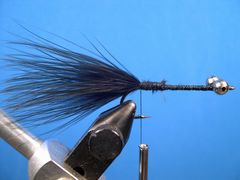 Step 5 Tie in the marabou tail at the bend as shown. 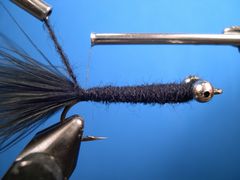 Step 6 Put a spool of Uni-Wool on a bobbin and attach it directly behind the eyes with a jam knot. Take several figure-eight wraps around the eyes and continue to build the tapered underbody. Once you are satisfied with the taper of the underbody, tie off the Uni-Yarn with the working thread. 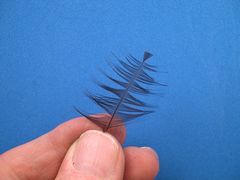 Step 7 Select a small feather from the bottom of the hen neck. Remove the fluff from the stem, stroke the fibers back from the stem, and prepare the tip as shown in preparation for starting the body building process. 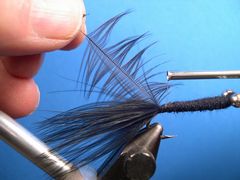 Step 8 Tie the feather in by it's tip at the base of the tail with the concave side of the feather facing the hook. 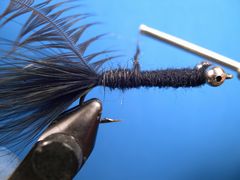 Step 9 Apply a thin noodle of dubbing to the thread and dub about a quarter of a inch of the body. 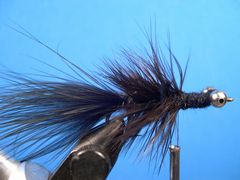 Step 10 Wrap the feather with fairly close wraps through the dubbed portion of the body. Tie off the feather and remove any excess. Repeat the process by first tying in another feather that is slightly larger than the first feather and then dub the body until you are slightly past mid-shank. 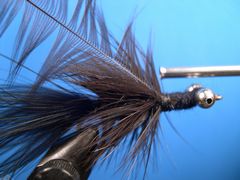 Step 11 After you have gotten to a place that is slightly past the mid-point of the shank, tie in another feather that is slightly larger than the last feather.  Step 12 Next, tie in two strands of rubber about two inches long on the far side of the hook and two pieces of rubber on the near side of the hook. 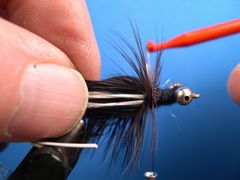 Step 13 Apply dubbing to the tying thread and pass the dubbed thread between the legs, in front of the legs, and continue on until you are about an eighth of an inch from the legs. Wrap the feather forward by taking one wrap behind the legs, one wrap between the legs, and one wrap directly in front of the legs as shown. Continue wrapping until you run out of feather or come to the dubbing break. Tie it off and remove the excess. 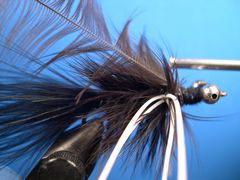 Step 14 Prepare and tie in another feather slightly larger than the last feather. Apply dubbing to the thread and dub forward, then wrap the feather forward and tie it off. 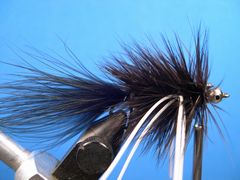 Step 15 Continue adding dubbing and slightly larger feathers, as you have done previously, until you reach the eyes. 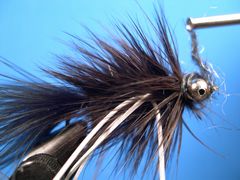 Step 16 Add dubbing to the thread and dub around the eyes with figure-eight wraps until you can see a clearly defined dubbed head. 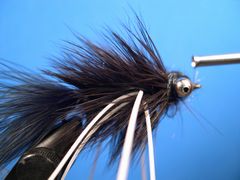 Step 17 Move the thread to the front of the eyes, form a neat thread head, and tie off the thread with two half-hitches or a whip finish. 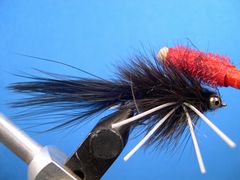 Step 18 Vigoriously brush the fly with your dubbing brush to marry the Hare-Tron with the hackle to give the fly a buggy look. 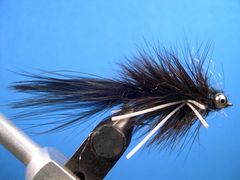 Step 19 Trim the legs so that the back legs are about an inch long and the front legs are about one-half inch long. Your Plan "B" is ready to fish. Good luck!
Warmwater Fly Tyer - by Ward Bean
© Copyright 2026 Ward Bean, Council Bluffs, IA, All rights reserved. © Copyright 2026 Ward Bean, Council Bluffs, IA, All rights reserved.
|