Swimming Flies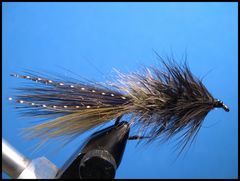 Soft Hackle Bi-BuggerThe Bi-Bugger, designed by Rich Osthoff, is intended to represent the sculpin minnows and crayfish that inhabit most trout and smallmouth bass streams. Rich is the author of a couple of great books. The book that interests me the most is "No Hatch to Match." Rick describes the Soft-Hackle Bi-Bugger in that book. Materials List
Tying NotesThis is another Rick Osthoff trout fly that he also uses for Smallmouth Bass. Rick is the author of "No Hatch to Match" and the creator of the famous Soft-Hackle Woolly Worm which is featured on the "Wet Flies and Nymph Page." The Bi-Bugger shown in the tutorial is being tied on a size 6 (3x long) streamer hook. In order to give the fly it's mottled appearance different colored materials are mixed as the fly is built. For instance, the tail has black marabou over olive marabou. The Bi-Bugger's body is built in phases so that different colors of dubbing and hackle can be used to continued the mottled theme. It's also done to accomodate hen neck feathers that are much shorter and softer than rooster feathers. Try to find Whiting Hen Necks. If your local fly shop doesn't have them or won't order them for you, go to the FlyTyerVariant.Com to order Whiting Products on line. The Web Address is: Angling TipsRich Osthoff uses the Bi-Bugger to represent Sculpin and/or Crayfish depending on how he ties it. Smallmouth are particularly fond of crawdads and Rich adds lead barbell eyes to some of his Bi-Buggers so he can hop them along the bottom of the stream. Tied the way it's tied in the tutorial that follows, the Bi-Bugger can be fished like you would fish any other weighted Woolly Bugger. Tied with ten or so wraps of .025 dia. lead wire, the Bi-Bugger will swim two feet or so below the surface. One productive way to bring bass out of deadfalls and brush piles is to probe the structure with the Bi-Bugger from an upstream position.  Tying Instructions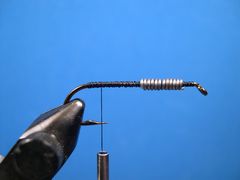 Step 1 Clamp the hook in the vice, crimp the barb, and lay down a base of thread from the hook's eye to the hook's bend. Place 10 to 12 wraps of lead wire at the front of the hook's shank. The size of the lead wire should be the same size as the hook's shank. 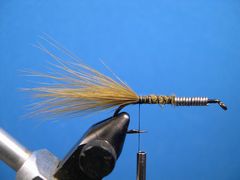 Step 2 Tie in the tip of an olive marabou feather for the tail. The tail should be about as long as the hook. 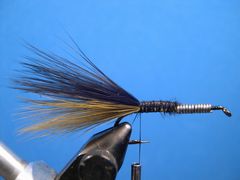 Step 3 Tie in the tip of a black marabou feather directly on top of the olive feather. 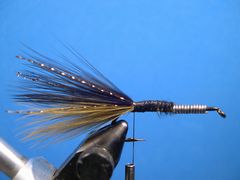 Step 4 Tie in two or three strands of gold crystal flash on the far side and the near side of the marabou tail. 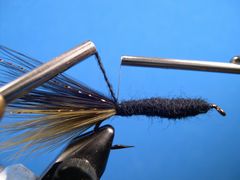 Step 5 Tie in the spooled Uni-Yarn at the front of the hook with a jam knot just like you did the tying thread and build the fly's underbody. Tie off the Uni-Yarn at the base of the tail with a couple of turns of the tying thhread and remove the yarn. 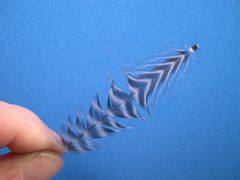 Step 6 Prepare a Grizzly "Whiting" hen neck hackle in preparation for tying it in. Note how the tip was prepared in anticipation of the next step. 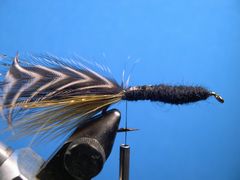 Step 7 Tie the feather in by the tip at the base of the marabou tail with the feather's cupped side facing the hook. 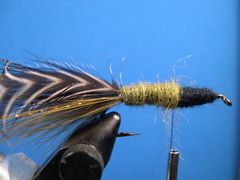 Step 8 Apply a thin noodle of olive dubbing to the thread and dub to the half-way point on the hook's shank. 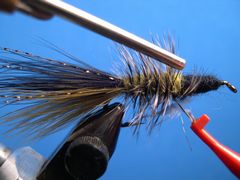 Step 9 Palmer (wrap) the feather forward to the dubbing break and tie the feather off with a couple tight wraps of thread. Remove the excess feather. 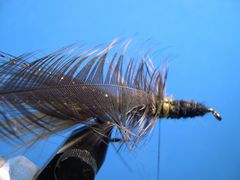 Step 10 Prepare a black "Whiting" hen neck feather the same way that you prepared the grizzly feather and tie it in at the dubbing break. 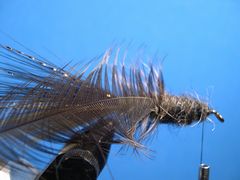 Step 11 Apply a thin noodle of black dubbing to the tying thread and dub the front half of the underbody. 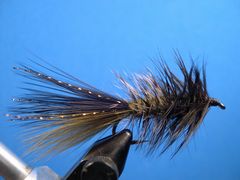 Step 12 Palmer (wrap) the black feather forward just as you did the grizzly feather and tie it off with the tying thread. Remove any excess feather. Form a neat thread head and tie off the thread with a couple half-hitches or a whip finish. 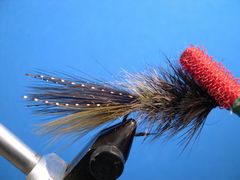 Step 13 Lightly brush the body with a Velcro Dubbing Brush to marry the feather's barbs with the dubbing to give the fly a buggier profile. Click on Dubbing Brush to learn how to make one for your tying bench. It's the best dubbing tool that you will ever use. 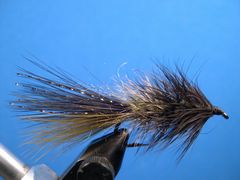 Step 14 Notice how much "buggier" the fly looks after it has been brushed with the Velcro Dubbing Brush. 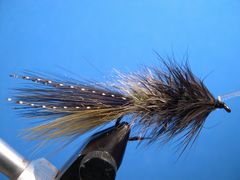 Step 15 Cement the fly's head with a coat or two of Sally Hansen's Hard As Nails nail polish. It's the best head cement around. 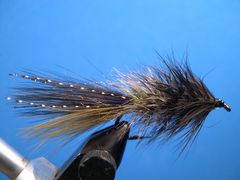 Step 16 Your Soft Hackle Bi-Bugger is ready to fish.
Warmwater Fly Tyer - by Ward Bean
© Copyright 2025 Ward Bean, Council Bluffs, IA, All rights reserved. © Copyright 2025 Ward Bean, Council Bluffs, IA, All rights reserved.
|