Swimming Flies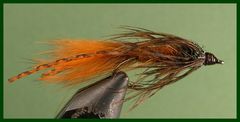 Swimming CrayfishThis Swimming Crayfish is my rendition of a Clouser Swimming Nymph pattern that Brad Befus submitted to Fly Fisherman magazine a few years ago. Brad said it was his top Carp producing fly. Here is how I tie it. Materials List
Tying NotesThere are a number of Crawfish patterns that are realistic representations of this well known fish fodder. And, there are a variety of impressionistic patterns as well. The Swimming Crayfish is one of the latter. Many anglers claim that impressionistic patterns work much better than the realistic variety. Dave Whitlock's Near 'Nuff Crayfish is a good example of an impressionistic Crawfish pattern that many fly fisherman swear by. Bob Clouser, best know for his Clouser Deep Minnow Series, is also the creator of a well know impressionistic nymph imitation called the Clouser Swimming Nymph. The Swimming Crayfish is basically a Clouser Swimming Nymph with a few extra parts. This pattern is relatively easy to tie. The only critical part is to leave enough room at the front of the fly to tie off the thorax and wingcase and, in the process, leave enough room for a neat thread head. Try to use Hareline Dubbin Rabbit (Zonker) Strips that are Crawfish Orange - #19. It's just the right color for the tail and abdomen. The tail on the Swimming Crayfish is a tuft of fur from the Crawfish Orange Rabbit strip. And, when it comes time to dub the abdomen you can finger blend another bunch of the same fur. Angling TipsI am looking forward to fishing the Swimming Crayfish this spring in a little shallow lake near my home that is loaded with Carp. And, I also look forward to fishing it for Smallmouth and Rock bass in Northeast Iowa's scienic Volga River this summer and fall. I haven't fished the Swimming Crayfish yet, but you can expect me to update you later on how I fish this little guy, and the success that I anticipate having with it. 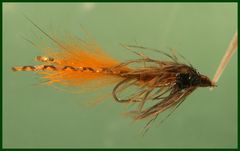
Swimming Crayfish In The Water Here is how the little fly looks underwater. Note the difference between this photo and a photo of the finished fly in the vice. It really looks "fishy" to me. But we'll see! When I fish it, there is one thing I definitely will do. I'll attach the fly to the leader with a fixed loop knot to ensure that it looks as life-like as possible. If you're not familiar with fixed looped knots, check out the Warmwater Knots Page.  Tying Instructions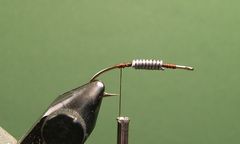 Step 1 Clamp the hook in the vice, crimp the barb, start the tying thread about 3/16" behind the hook's eye. Lay down a thread base back to the hook's point. Wrap 8 to 10 wraps of lead wire, about the thickness of the shank, centered on the shank. Coat the lead wraps with Dave's Flexament. 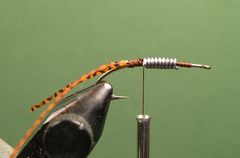 Step 2 Select a strand of leg material for the antenna, double it around the thread, and attach it to the rear of the hook with thread wraps from the base of the lead wire back to the hook's point. 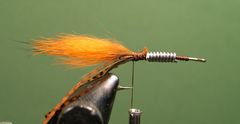 Step 3 Clip a small tuft of fur from the Rabbit strip for the tail, trim the butts, and tie it in directlly on top of the antenna thread wraps. 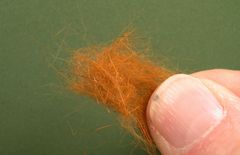 Step 4 Clip another tuft of fur from the Rabbit strip, remove as many gurad hairs as possible, and finger-blend it so that it can become the dubbing for the body. Of course, you could also blend the fur in a coffee grinder but finger blending is a lot easier. 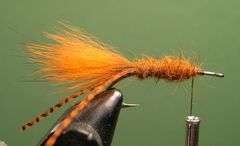 Step 5 Dub the abdomen to the front of the thread base. 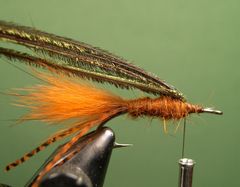 Step 6 Select four herls, for the wingcase, from a Peacock Eye.Tie them on top of the hook's shank, directly in front of the abdomen, by their tips. 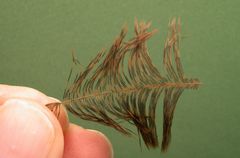 Step 7 Select a wide webby feather from a hen cape or saddle and prepare it to attach to the fly. The feather's barbs should be long enough to reach to the hook's point after it's tied in. 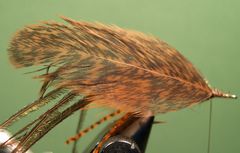 Step 8 Tie the hen feather in at the base of the Peacock herl. 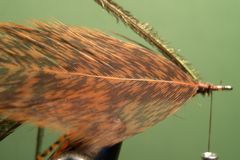 Step 9 Select three herls from a Peacock Eye, for the thorax, and tie them in by thier tips directly in front of the hen feather. 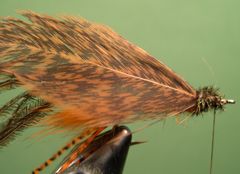 Step 10 Marry the three Peacock herls, for the thorax, with the thread and make a Peacock herl rope by twisting the thread and the herls together. Wind the Peacock herl rope forward and tie it off. Remove the excess herl. Make sure that you leave enough room for the thread head.  Step 11 Palmer the hen feather through the throax and tie it off. Remove any excess feather. Leave room for the thread head. 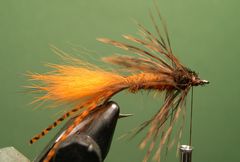 Step 12 Pull the four remaining Peacock herls forward to form the wingcase and tie them them off. Remove the excess herl. Leave room for the thread head. Be sure to seperate the hen feather fibers when you do this step so that you don't bind them to the body with the wingcase. 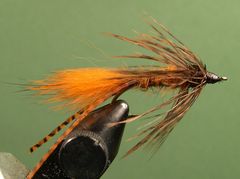 Step 13 Form a neat thread head and tie off the thread with a couple of half-hitches or a whip finish. Coat the thread head with a couple coats of head cement and your Swimming Crayfish is finished.
Warmwater Fly Tyer - by Ward Bean
© Copyright 2025 Ward Bean, Council Bluffs, IA, All rights reserved. © Copyright 2025 Ward Bean, Council Bluffs, IA, All rights reserved.
|