Wet Flies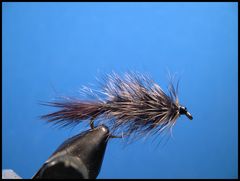 Soft Hackle Woolly WormThe Soft Hackle Woolly Worm was created by Rick Osthoff of Mauston, Wisconsin as a searching pattern for Trout in his favorite Southwestern Wisconson spring Creeks. I like it for that purpose too, but I also like to use it for Bluegills, Redears, and Rock Bass. Materials List
Tying NotesAs we know, the standard Woolly Worm is made with a red wool tail and a chenille body hackled with grizzly rooster neck hackle. Wisconsin angler, author, and fly tier, Rick Osthoff had used the standard Woolly Worm for years on his favorite SW Wisconsin Spring Creeks. Over time he came to believe that the "old standard" could be greatly improved. So he set out to do just that. Rick wanted a Woolly Worm that would have a stronger profile and much more action in the water than the original did. The first thing he did was replace the wool tail with a tuft of rabbit fur from a Zonker Strip. The second thing he did was build a body covered with a dubbing blend of rabbit fur and clipped antron. And finally, he hackled the body with a a couple of soft hen neck feathers.  The result was a soft buggy looking fly with a tail and hackle that pulsated in the water which gave the little guy a lot of fish appeal. Angling TipsFish the Soft-Hackle Woolly Worm in ponds and lakes with the same retrieves that you use with other nymphs and wet flies. Strip it an pause or strip it with slow steady strips. Moving water is another matter. Remember, this little guy was designed by a fellow who fishes spring creeks and freestone streams for trout. It's strength in moving water is that it can be fished as a nymph, a wet fly, or a streamer. So, if you happen to have the opportunity to fish for panfish in moving water don't hesitate to fish it as if you were fishing it in a trout stream. And, if you fish for trout, try it as a searching pattern the next time you're trout hunting. Tying Instructions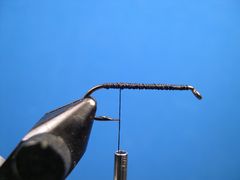 Step 1 Clamp the hook in the vice, attach the thread at the hook's eye, and lay down a base of thread from the hook's eye to the hook's bend. 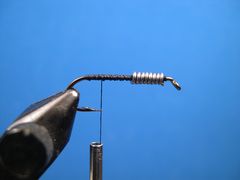 Step 2 Attach the lead wire and place ten wraps or so on the front half of the hook's shank. 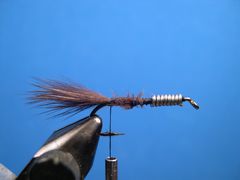 Step 3 Clip a tuft of rabbit fur from a Zonker Strip and tie it in for the tail. The tail should be about half the hook's length. 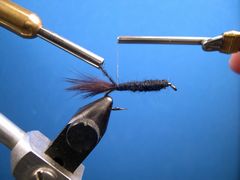 Step 4 Attach the Uni-Yarn at the head with a jam knot just like you did when you started the tying thread and build a tapered body as shown. Bind the yarn to the hook at the base of the tail with a couple of turns of the tying thread and remove the yarn. 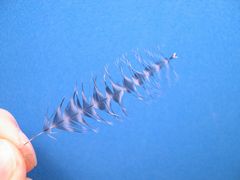 Step 5 Select and prepare a feather from a hen neck (cape). The feather's barbs should be about the length of the distance between the hook's shank and the hook's point. Hen neck feathers are very soft. That softness makes them very lifelike in the water. The best hen neck for this fly is a "Whiting Hen Neck." For more info on Whiting Hen Necks click on Whiting Farms. 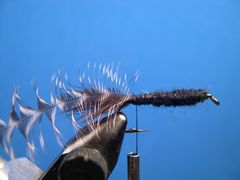 Step 6 Tie the feather in by it's tip at the base of the tail. Be sure that the cupped side is facing the hook so you can wrap the feather "wet fly style." 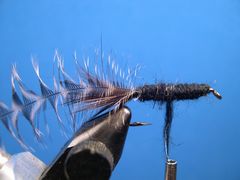 Sstep 7 Apply a thin noodle of dubbing to the thread and dub the body to half-way on the hook's shank.  Step 8 Palmer the hackle forward with fairly close wraps so that you end up at the end of the dubbing. Tie off the feather with a couple turns of thread and remove any excess. 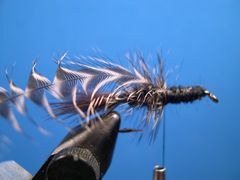 Step 9 Tie in a second hen neck feather that has barbs that are slightly longer than the distance between the hook's shank and the hook's barb. Be sure that the cupped side of the feather is facing the hook. 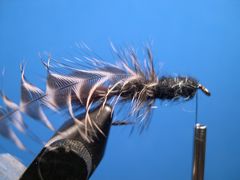 Step 10 Apply a thin noodle of dubbing to the thread and dub the body up to the front of the underbody.  Step 11 Palmer (wrap) the feather forward and tie it off with a couple turns of thread at the front of the underbody. Remove any excess. 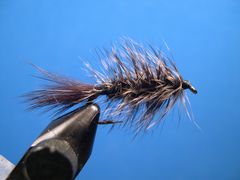 Step 12 Form a neat thread head and tie off the thread with a couple of half-hitches or a whip finish. 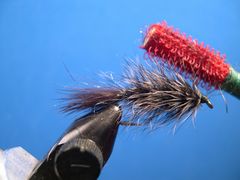 Step 13 Brush the fly with a Velcro Dubbing Brush to marry the dubbing with the feather barbs. This gives the fly a "buggier look." To learn how to make your own Velcro Dubbing Brush click on Dubbing Brush. 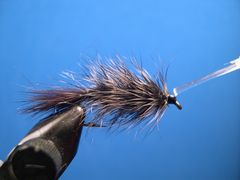 Step 14 Paint the thread head with head cement. I use Sally Hansen's Hard As Nails nail polish. It's the best head cement there is. 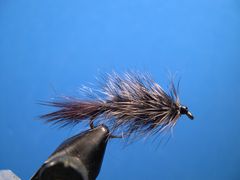 Step 15 Your Soft-Hackle Woolly Worm is finished. Go fish!
Warmwater Fly Tyer - by Ward Bean
© Copyright 2026 Ward Bean, Council Bluffs, IA, All rights reserved. © Copyright 2026 Ward Bean, Council Bluffs, IA, All rights reserved.
|