Terrestrials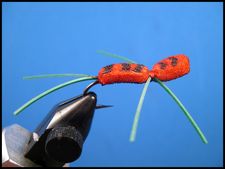 Orange Foam SpiderHere's how I tie the Orange Foam Spider. It's my favorite color pattern followed by a yellow spider with a black belly and one that is black with red spots. Materials List
Tying NotesThis little foam bug is my rendition of a fly that William G.Tapply wrote about in either American Angler or Fly Tyer. It does't matter. Both are great magazines. And Tapply, who is a outstanding author of mystery novels as well as outdoor life books, is a great read no matter which of his books you happen upon. I use live rubber on most of my warmwater flies for two reasons. First, it was the only legging material available in the early days and I'm old fashioned. Second, it comes in a variety of sizes - small, medium, and large - and a variety of colors, unlike most other legging materials. But you should use whatever legging material suits you. The best hook for the Foam Spider is a standard dry fly hook. I use white foam and color it with a permenant marking pen. Eventually, the colors will fade and you will have to touch the foam up. Here are the widths of the fly foam strips for each hook size. Hook size 6 - foam width - 3/8", hook size 8 - foam width - 1/4", Hook size 10 - foam size 3/16". Tying Instructions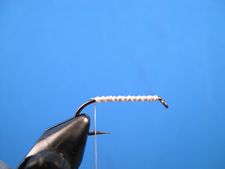 Step 1 Clamp the hook in the vice, crimp the barb with needle nose pliers, and start the thread at the hook eye. Cover the hook shank from the eye to the hook bend with three or four layers of thread. Let the thread hang at the hook point. 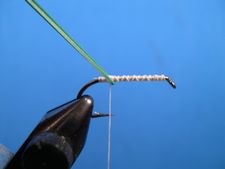 Step 2 Cut a three-inch piece of rubber. Fold the rubber strand to make a loop. Grasping the ends, slip the loop under the hook shank. Bring the rubber strands back to the tie in point, pull up slightly on them, and bind them down as shown in the photo.The thread should end up at the rear of the thread base. Cut the tail length to one-half inch or slightly longer. 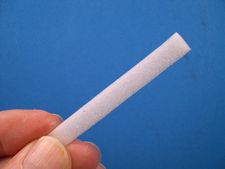 Step 3 Cut a two-inch long piece of Fly Foam that is 1/4" wide. This is the width I like for a size a size 8 hook. 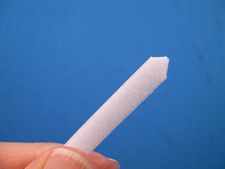 Step 4 Trim one end to a point as shown in the photo. 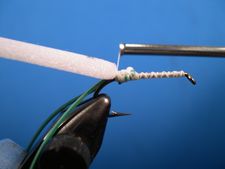 Step 5 Catch the foam point with the thread and bind it to the shank as shown in the photo. Wrap back until the foam body covers the base of the tail. 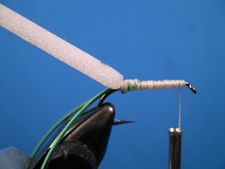 Step 6 Even out the underbody as best you can by taking as many thread wraps as necessary from the front to the back and back to the front. 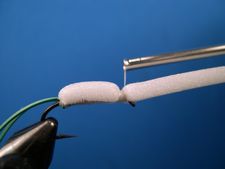 Step 7 Position the tying thread one eye width behind the hooks eye. Bring the fly foam strip forward and bind it down with several wraps of thread wrapping the thread back against the foam to make a space for the legs. 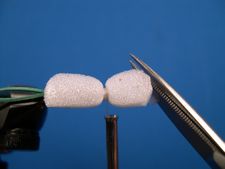 Step 8 To form the head cut the excess foam leaving a head about 5/16" long. Trim the front of the head as shown. 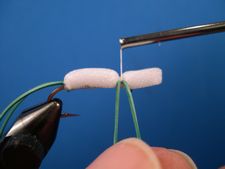 Step 9 Cut a five inch strand of green living rubber into two equal strands. Fold and even the first strand around the thread and tie the leg in on the near side of the hook with three or four wraps of thread. Fold and even the second strand and tie it in on the far side of the hook with three or four turns of thread. 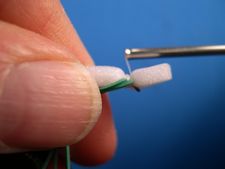 Step 10 Pulling the legs back, as shown in the photo, move the thread to the front of the legs and take a couple turns of thread. 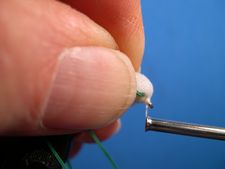 Step 11 Then, pull the head back as shown, move the thread to the hook eye, and take a couple of half-hitches to tie off the thread. 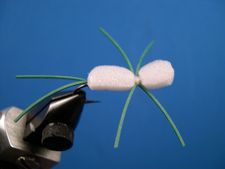 Step 12 This is the way your Orange Spider should look before it gets its paint job. 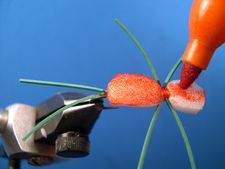 Step 13 Paint the back and the sides of the spider bright orange. 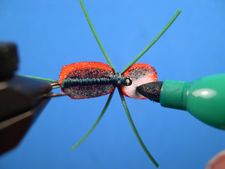 Step 14 Paint the spider's belly bright green. 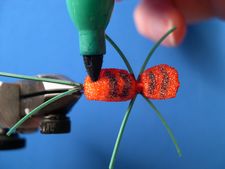 Step 15 This bit of decoration is for me. The fish can't see it. But, I can and I like the way it looks. 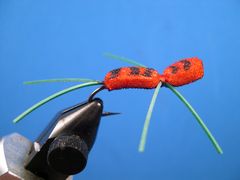 Step 16 The little Foam Spider is finished. Have as much fun catching "Gills" with it as I do.
Warmwater Fly Tyer - by Ward Bean
© Copyright 2026 Ward Bean, Council Bluffs, IA, All rights reserved. © Copyright 2026 Ward Bean, Council Bluffs, IA, All rights reserved.
|