Bottom Flies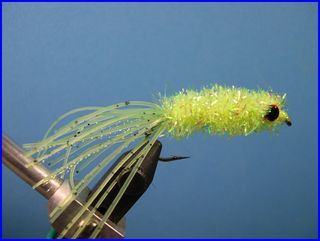 Fly Rod Tube JigThe tube jig, in its various forms, has been a great lure for bait castors and spin fishermen over the years. This is the fly rod version of that very productive lure. Materials List
Tying NotesBack before I got religion, and took the fly rod as my only fishing rod, I would use a bait casting, a spin casting, or a fly rod as the spirit moved me or the fishing condition required. In those days the tube jig was a very effective lure on both the casting and the spinning rod. I caught a lot of bass on larger tube jigs and bluegills on smaller versions although I generally used a fly rod for the latter. It occured to me that since the tube jig had been effective in those days, a fly rod version designed for the long rod might also be effective. So, I came up with the lure shown in the tying sequence that follows. I'm sure that other fly tiers have come up with similar designs and I certainly don't claim the Fly Rod Tube Jig to be original with me. The Fly Rod Tube Jig is a simple and straight-forward fly to tie. Those new to fly tying should have no problem making it. Just make sure that you don't use lead barbell eyes that are heavier than needed. On the size 2 tube jig in the tying sequence I'm using small eyes. If you want to tie bluegill sized tube jigs I would suggest using a size 6 or 8 hook with extra-small barbell eyes and Petite Estaz for the body. Fine legging material for the tail would also be a good choice. Legging material comes in a variety of colors and sizes. In most catalogs you will find round rubber, flat rubber, licra, spandflex, centipede, and sili-legs to name a few. Any legging material or a combination of materials will work. Experiment with different colors and combination of colors when you tie up a bunch of Fly Rod Tube Jigs. Pearl, black, purple, and yellow would be other good choices. Angling TipsFish the Fly Rod Tube Jig like you would any other jig type fly. Tying Instructions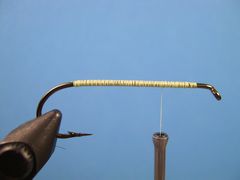 Step 1 Clamp the hook in the vice, attach the thread a couple of eye widths behind the hook's eye and lay down a thread base back to the hook's bend. 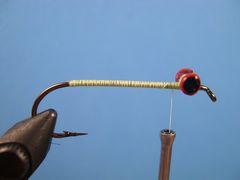 Step 2 Tie in the lead barbell eys at the front of the thread base with several figure-eight wraps. Use a drop or two of super glue to lock the eyes in place. 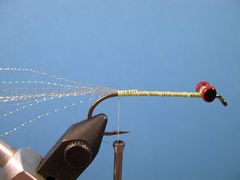 Step 3 Tie in a bunch of Krystal Flash at the rear of the hook stopping the thread at the end of the thread wraps. 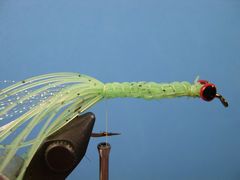 Step 4 Tie in several strands of leg material binding it down from the lead eyes back to the end of the thread base at the rear of the hook. Lightly bind the leggs to the shank so that the legging material surrounds the hook's shank. 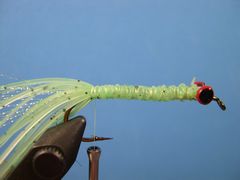 Step 5 Now, bear down on the thread and wrap forward to the lead eyes and back to the base of the legs to reduce the size of the material along the hook's shank. 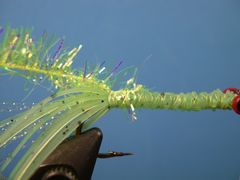 Step 6 Tie in the Estaz at the base of the legs. 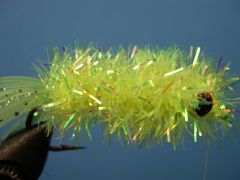 Step 7 Move the thread to the front of the lead eyes. Wrap the Estaz forward to the lead eyes with tight wraps, then figure-eight the Estaz around the lead eyes a couple of times and tie it off at the hook's eye. Be sure to stroke the Estaz fibers back with your free hand as you make successive wraps. This practice keep you from binding down the fibers from the previous wrap. 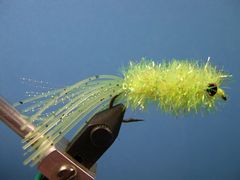 Step 8 Tie off the Estaz, remove any excess, and form a neat thread head. Remove the fly from the vice and trim the Estaz with serriated scissors to give the body a cylindrical shape. Soft plastic tube jigs used by the bait casters are always cylindrical. After you are satisfied with the trim go fish the fly.
Warmwater Fly Tyer - by Ward Bean
© Copyright 2026 Ward Bean, Council Bluffs, IA, All rights reserved. © Copyright 2026 Ward Bean, Council Bluffs, IA, All rights reserved.
|