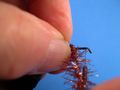
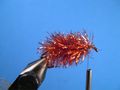
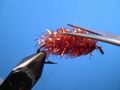
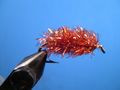
At The Bench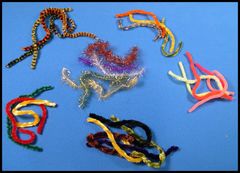 Tying With ChenilleChenille is one of the most common of the man-made fly tying materials. It's also one of the oldest. If you took a fly tying class, I'll bet that chenille was one of the first materials you learned to use. The first fly that most fly tying students learn to build is either a Woolly Worm or a Woolly Bugger. Each fly, tied with its original dressing, has a body made from chenille. But the Woolly Bugger and the Woolly Worm are just two among a host of chenille bodied flies designed to take cold, warm, and saltwater gamefish. 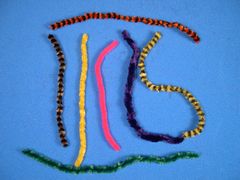 Modern chenille is made from synthetic materials. Common chenille, made from rayon or nylon, is available to tiers in a variety of colors and sizes. Sizes include Extra Fine, Fine, Medium, and Large. Colors range from black and white to Lavender and Fuscia. There are even florescent and variegated colors. Common chenilles are most often used by warmwater fly tiers. One of the newest chenilles on the market is called Tri-Lobal Antron Chenille. The Feather-Craft catalog bills it as the most virbrant and reflective chenille ever, claiming that it will replace common chenille. We'll see!  Other synthetic chenilles, sometimes referred to as the "flashy chenilles" are available in a variety of forms ranging from short fibered Tinsel Chenille to the longer fibered Cactus Chenille. The "flashy" chenilles, because of their glitz, are very appealing to most species of gamefish. Perhaps the most common of the flashy synthetic chenilles is Estaz. Over the years I have picked up a couple of tricks that really improved my ability to tie flies that had chenille as a major part of the dressing. Here they are. Most common chenille is wrapped around a piece of cardboard and it generally is crushed and wrinkled. In that condition, it's not very easy to work with, and it certainly doesn't make very attractive bodies. But, if you steam a piece of chenille, by holding it over a "hot pot" containing boiling water, the chenille will return to its intended shape as the rising steam works its magic. 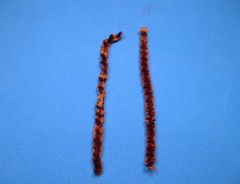 Notice the two pieces of brown chenille in the photo. The one on the left has just been removed from the card. You can see that it looks pretty ratty. The one on the right has been steamed. You have to admit that it looks much better than the one on the left. In case you have never heard of a "hot pot," it's a small electric pot that college students keep in their dorm rooms to heat water for instant coffee, hot chocolate, and soups. The"hot pot" in the photo is an old-timer purchased at a Goodwill Store for a buck and a half. I have noticed that "second hand stores" always seem to have a number of them. The new ones at Target and K-Mart are about $15.00. The hot pot along with a blow dryer, that quickly dries steamed materials, are two of the most useful tools on my tying bench.  Here is a piece of brown chenille held over the water before the hot pot begins to steam. The steam will begin to rise once the water comes to a boil. 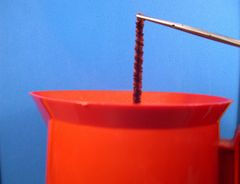 Here is how that same piece of chenille looks as the steam is working its magic. It brings the chenille back to its intended form. It not only looks better but it works better when you bind it to the hook's shank. If you want to dry the chenille quickly, after it's steamed, hit it with a hand-held hair dryer for a couple of seconds. There is a right way and a wrong way to wrap chenille on the hook's shank. 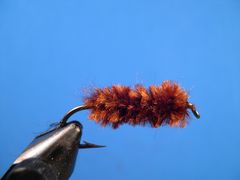 Most tiers simply strip a bit of fluff off the core that forms the center of the chenille, then bind the core to the hook's shank, and preoceed to wrap the chenille up the shank. If that's how you do it, your chenille body ends up looking like this. The body has no natural taper. We all want our lures to look as buggy as possible so here is how you wrap chenille on the hook's shank to give your lure's body a tapered, natural, buggy appearance. 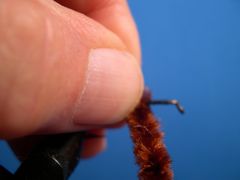 After you attach a piece of chenille to the hook's shank, stroke the chenille's fibers back with the thumb and index finger of your left hand as you a complete each turn of chenille with your right hand. Repeat the stroking and wrapping process as you proceed to the tie down point. Be certain to stroke all chenille fibers rearward as you go. 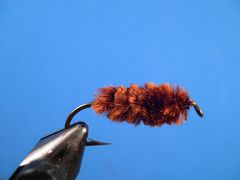 Here is how a chenille body looks when this procedure is employed. Compare it to the body in the photo above and notice how you easily achieve a naturally tapering body as apposed to the unnatural non-descript body in the other photo. I think you will agree that this is the right way to wrap chenille onto a hook's shank. And, this procedure works with all sizes of chenille from small to large. This same procedure should also be used with many of the flashy chenilles, especially those with long fibers. 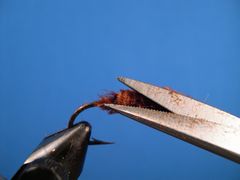 After the chenille body is complete, you might want to reduce its size. That can easily be done with a curved serrated scissors. 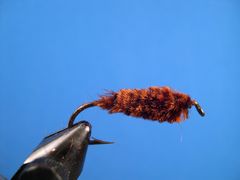 Here is how the body in the above photo appears after a few snips with the scissors. You can see a dramatic difference in the size and shape. As you can see, chenille bodies can be easily shaped so they can be proportionate to the rest of the fly's components. As mentioned earlier, you can use the same procedure that you use for common chenille to wrap and trim the flashy chenilles like Estaz and Cactus Chenille.
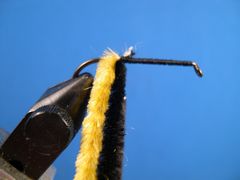 Wet flies with chenille bodies that have a brindled effect are very attractive to panfish. To achieve a brindled effect you must use two colors of chenille. Select two contrasting colors of chenille. After you have steamed the chenille, strip some fibers from the center core of each piece and bind the pieces to the hook. 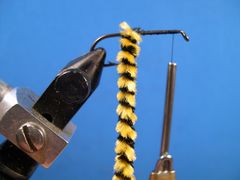 Grasp the two pieces of chenille with the thumb and index finger of your right hand and twist it tightly to make a chenille rope. Then, keeping the chenille tightly twisted, proceed to wrap it up the hook's shank to the point where you want to tie it off. 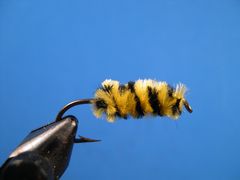 This is how the body will look after it has been wound up the hook and tied off. It definitely needs to be trimmed to a buggier shape. And, a pair of curved serriated scissors is up to the job. 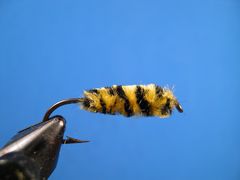 This is how the body will look after some snips with your curved serriated scissors. It now has a more natural profile with a well defined thorax tapering to a slimmer abdomen and even slimmer tail. Looks a lot better, don't you think?
Warmwater Fly Tyer - by Ward Bean
© Copyright 2026 Ward Bean, Council Bluffs, IA, All rights reserved. © Copyright 2026 Ward Bean, Council Bluffs, IA, All rights reserved.
|