Featured Fly Tiers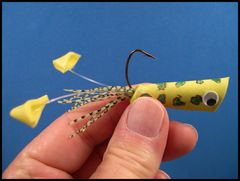 Fred's FrogBy Fred DuPupre' Fred's Frog is a big bass lure made from Fun Foam, Sili Legs, and Mason Hard Mono that has proven to be deadly on Lake Fork, Texas and other large impoundments. Materials List
Tying NotesThe overall length of Fred's Frog is about three and one-half inches. Fun Foam can be purchased at most hobby or craft shops. The foam used here was purchased at Walmart in their craft section. If you're not familiar with Mason Hard Mono Leader Material, the material used for the legs on Fred's Frog, it comes on bulk spools and on smaller spools that contain 25 yards of material. Use mono from the small 25 yd. spool because it makes perfectly curved legs as it comes off the spool. 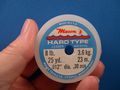 Here is what a 25yd. spool of Mason Hard Type (mono) leader material looks like. You will need clamps to hold the fun foam together after super glue has been applied. Regular "office type" paper clamps would probably work if you can't locate clamps similar to those used in the tying tutorial. Angling TipsTying Instructions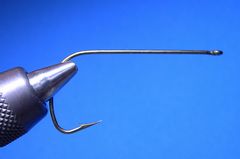 Step 1 Insert the hook in the vice and crimp the barb. 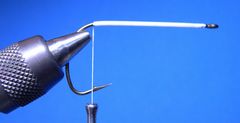 Step 2 Lay down a base of thread from the hook's eye to the hook's bend. 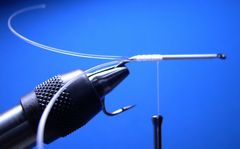 Step 3 Seperate an eight-inch piece of Mason Hard Mono into two four-inch pieces for the legs. Tie one piece of four-inch mono on the far side of the hook and the other piece on the near side of the hook, as shown, with the concave side of the mono legs facing the hook's eye. 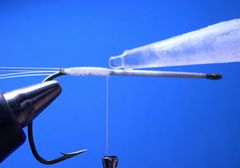 Step 4 Cement the thread wraps with super glue. 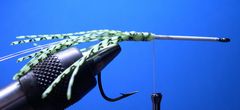 Step 5 Attach twelve sili legs that are one and one-half inches long on top of the hook's shank to form the tail. 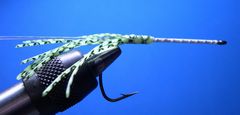 Step 6 Wrap thread forward to the hook's eye with open spirals and tie off with a whip finish or two half-hitches. Open spirals of thread will hold the glue better in a later step. 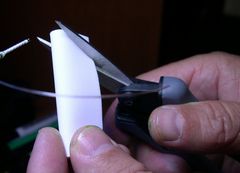 Step 7 Invert the hook either by rotating the vice if you have a rotary vice or by turning the hook upside down in the vice's jaws. Cut a 1 1/2" by 2" inch rectangle from a piece of fun foam. Fold the foam rectangle length wise and trim the front of the foam at a 45 degree angle as shown. 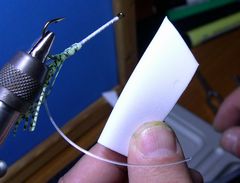 Step 8 This is the way the piece of foam should look after it has been trimmed. 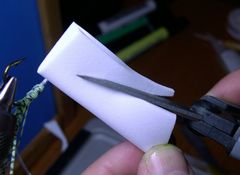 Step 9 With the rectangular piece of foam folded cut it lengthwise from the slanted front almost to the back. Don't cut it all the way until you have measured it for length against the hook's shank. 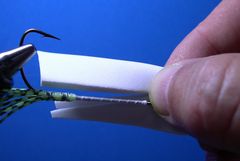 Step 10 Measure the folded foam for length against the hook, before making the final cut, with the back end of the foam covering the leg wraps at the hook's bend and the front of the foam, that's been cut at a diagonal, covering one-half of the hook's eye. 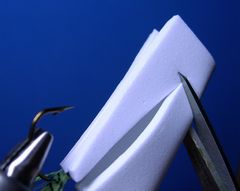 Step 11 Cut the rear of the folded foam at the same angle that you cut the front of the folded foam in step 7 and 8. Now measure it once more against the hook. The rear of the folded foam should be in line with the hook's bend and the bottom front of the folded foam should cover about one-half of the hook's eye. Make adustments if necessary. 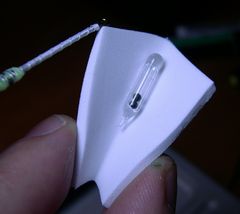 Step 12 Fold the foam and add some super glue and glue in the worm rattle as shown. 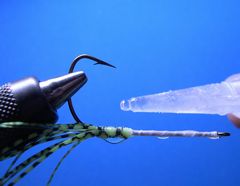 Step 13 Apply super glue to the right and left side of the hook's shank from the base of the tail to just behind the hook's eye in preparation to install the frog's body. 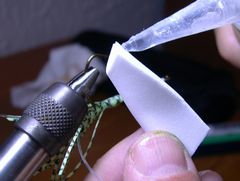 Step 14 Apply a thin bead of super glue to the inside edge of one side of the folded foam. 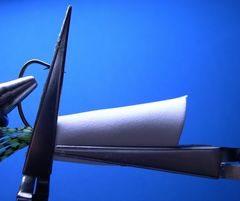 Step 15 Fold the foam body over the hook's shank with the back of the foam even with the hook's bend and the front of the foam body covering about half of the hook's eye. Attach clamps to the foam body while the glue dries. It takes just a few moments for the glue to dry. If you can't locate clamps like the ones shown in the photo, simple office style paper clamps in appropriate sizes should work. 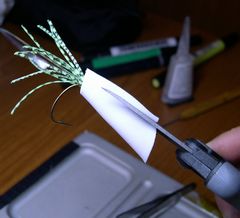 Step 16 Remove the fly from the vice and trim the fly's belly by cutting the foam just below the hook's shank. 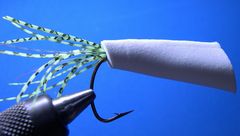 Step 17 Clamp the fly back in the vice in preparation for installing the frog's feet. 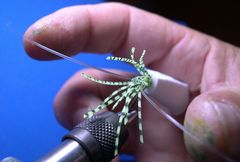 Step 18 This photo shows the points where each mono leg should be trimmed before the feet are installed. The point where the cuts will be made are at the top of the curved mono. 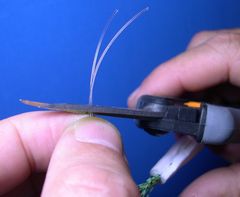 Step 19 Bring both legs together and trim them at the top of the curve. 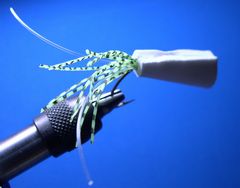 Step 20 This is the way that the mono legs should look after they have been trimmed.  Step 21 Cut a 3/4" square piece of yellow fun foam and then cut the foam square diagonally into two triangle shaped pieces that will be used for the frog's feet. 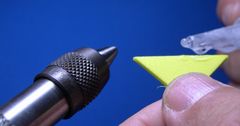 Step 22 Place a slight bead of glue on the inside of one of the edges of the first triangular piece of fun foam. 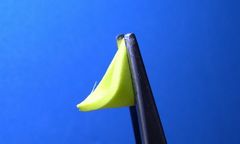 Step 23 Fold the triangular piece to form the foot and attach a clamp to the foam until the glue dries, which takes just a moment or two. Repeat this procedure with the other triangular piece of foam so that you end up with two frog's feet. 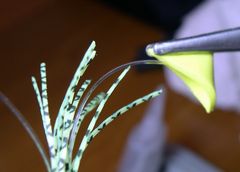 Step 24 Put a drop or two of super glue in the pocket of each foot and attach the foot to the Mono leg. Hold the foot with your fingers, or in this case the clamp, until the glue dries which takes just a moment or two.  Step 25 This is the way the feet and legs should look after the feet have been attached to the legs.  Step 26 To ensure that a big old bass doesn't knock the feet off the legs, add a few more drops of glue in the pocket of each foot.  Step 27 Now it's time to give the fly it's frog like finish. First paint the entire body, except the belly, with a chartreuse colored permanent marker. Next, with a black marker, outline the splotches on the frog's body. Finally, fill in the splotches with a dark green marker. 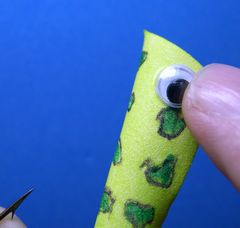 Step 28 To attach the eyes, apply a drop or two of super glue to the back of each eye, and place them at the front of the foam body.  Step 29 Your own version of "Fred's Frog" is finished and ready to be fished.
Warmwater Fly Tyer - by Ward Bean
© Copyright 2026 Ward Bean, Council Bluffs, IA, All rights reserved. © Copyright 2026 Ward Bean, Council Bluffs, IA, All rights reserved.
|